 The Interoperability Standard
for Industrial Automation
| Welcome | OPC Foundation Online | Certification | Technology | News | https://gitHub.com/OPCFoundation |
Unified Architecture Technology Sample Applications
 The Interoperability Standard
for Industrial Automation
| Welcome | OPC Foundation Online | Certification | Technology | News | https://gitHub.com/OPCFoundation |
Unified Architecture Technology Sample Applications
OPC is best understood by example. The following guide provides you with some very basic overview concepts, along with some simple exercises to learn OPC technology by demonstration.
Several OPC UA Servers and Clients have been installed as part of this package. First, we will launch the DA Server and then the DA Client
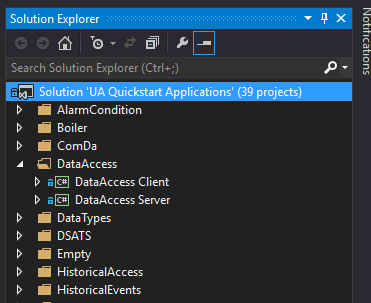
Open the Source code in Visual Studio .NET 2013 so you can see the Data Access projects:

Compile the solution.
Both applications can be found here :
<source root>\SampleApplications\Bin\Debug\.
First, launch the server: DA Server: QuickStarts.DataAccessServer.exe
Second, launch the client: DA Client: QuickStarts.DataAccessClient.exe
Both applications should now be open on-screen.
The DA Server will show its endpoint at the top of the window. See DA Server GUI. Using the mouse, simply highlight the endpoint and then copy it to the Windows clipboard.
Switch to the Generic UA Client and then paste the endpoint into the endpoint field. See DA Client GUI.
TIP: The following step-by-step tutorial shows HTTPS connectivity.
Click the Connect button, which is displayed at the far-right of the endpoint address field.
The Server will validate the client's request and the connection should be established.
If the connection is rejected by the server, then this will almost certainly be a certificate trust issue. See Troubleshooting section for tips on fixing this problem.
A powerful feature of OPC is the ability for a Client to browse the Server and see the data that is currently available. All data is stored in a structure similar to a file and folder concept, except in OPC these are called "Nodes".
In this exercise we will use the DA Client only.
The main visible area of the client window shows the navigation area.
Simply expand/collapse the visible nodes to continue the navigation experience. See Address Space Navigation for more details.
You can acquire data on-demand by using a Read, which allows you to read 1..n Nodes in a single call. This is very useful for obtaining a "snapshot" of the current values. Many OPC Servers will actually obtain the data from the underlying device/system prior to returning the values to the client.
In this exercise we will use the DA Client only.
Simply locate a Node within the main navigation area and then click on it, this will automatically invoke a Read.
The attributes and values associated with the selected node will be displayed on the right-side of the window.
Read 1 node.
Read a node in a different location.
In addition to acquiring data, Clients can provide data to a Server too via a Write operation. You can write to 1..n Nodes within a single call, and can specify the value and/or quality for each node.
In this exercise we will use the DA Client only.
Simply locate a Node within the main navigation area and then right-click (to activate the context menu) and choose Write.
Specify a value to write and then click OK.
The value will be immediately written to the node; some nodes are read-only whereas others are read/write so be prepared to see dialogs indicating a write failure.
Write to 1 node of each data-type.
Write to 3 nodes (while varying the data type) in a single call.
Subscriptions are the most powerful and optimized method of continuous data acquisition. You cannot compare a subscription to continuous Read operations. Subscriptions cause a Server to poll a device on-behalf of the Client, and when the Server detects that a Node's value has changed then the Server will send the new information to the Client. This method reduces the load on the Client, reduces the load on the Server, and can also reduce the load on the underlying device, particularly when multiple Clients are subscribing to the same nodes (and at the same frequency).
In this exercise we will use the DA Client only.
Simply locate a Node within the main navigation area and then right-click (to activate the context menu) and choose Monitor.
The node will show updated values as they occur in the bottom area of the client window.
Add items to an existing subscription.
Remove items from an existing subscription.
Tip: use the context-menu in the subscription area of the client window.
Change the properties of items within a subscription to enable/disable per item etc.
To learn how to configure an application to trust or not-trust other applications simply refer to the Securing Applications Tutorial.
There are many, many other features of OPC that are not described here, although some are mentioned throughout this help documentation.
For more information about OPC Unified Architecture features and capabilities see About Unified Architecture.